Visiting the US Virgin Islands – the Ultimate Guide

Visiting the US Virgin Islands Image 1

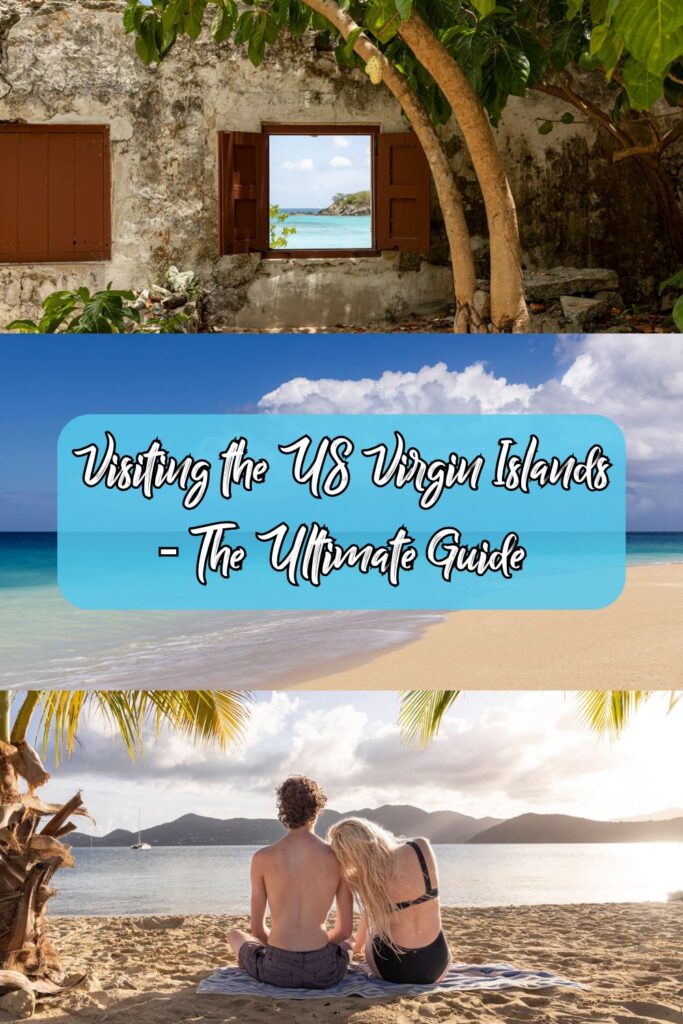
So you plan on visiting the US Virgin Islands? I completely support this decision! If you are a US resident, you don’t need a passport; these islands are significantly less crowded than other islands (looking at you, Oahu). They can be a pretty inexpensive flight, depending on the time of year you visit. While there are around 50 islands that make up this US territory, the big three are St Thomas, St John, and St Croix. This guide’s primary focus is to give you an idea of the opportunities, my recommendations, and the vibes each of these islands has to help you decide which island to visit and what experiences to enjoy!

If you are driving around the islands, many roads are steep, and potholes are quite common. A Jeep is a common sight when visiting the US Virgin Islands. Be sure to book yours well in advance. I was grateful I had one to scoot around the islands!

I am not one to be too long-winded, so with that, let’s dive in!

St Thomas

Visiting the US Virgin Islands Image 2
View of Charlotte Amalie

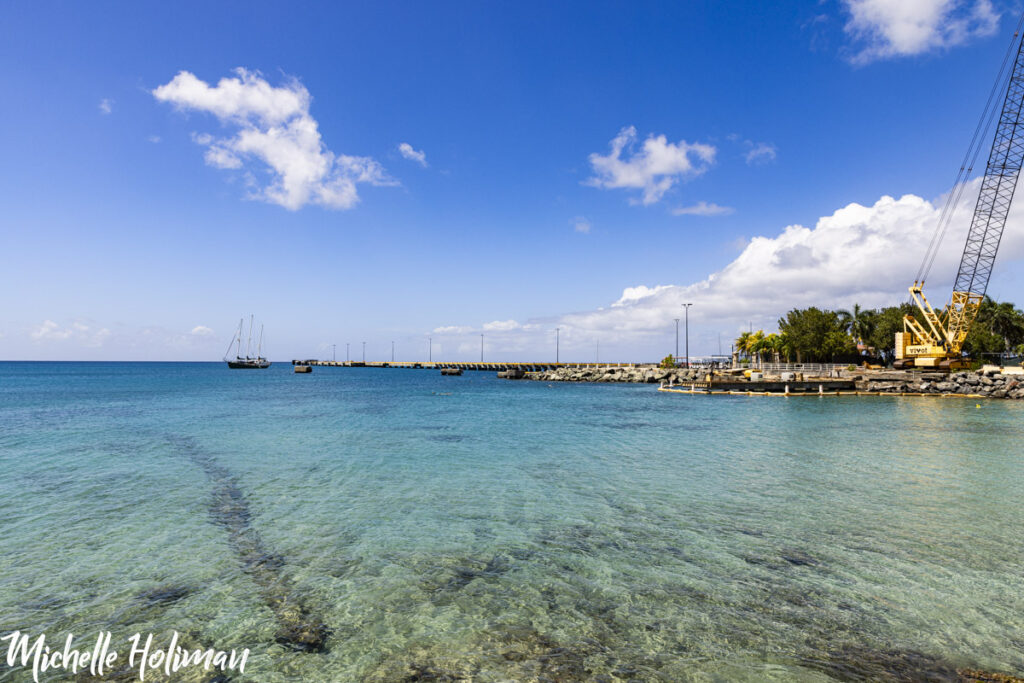
As the most popular island, St Thomas is built for tourism. From shopping in the historic Charlotte Amalie to the countless scuba diving, snorkeling, and boating centers, St Thomas has something for everyone. The main airport is on this island, and it is a regular stop for many Caribbean cruise lines. Travelers cannot get enough of the soft, sandy beaches, glittering turquoise waters, and postcard-perfect views of palm tree-lined coves. That being said, it is easy to flounder (perhaps a fish pun?) in all the adventure and relaxation opportunities. That and it means that St Thomas can be crowded, which can get in the way of experiencing all the iconic things this island has to offer.

So if you want to avoid crowds, I have found the ultimate live hack for visiting the US Virgin Islands: Check the cruise ship schedule. Seriously, don’t skim over this point. You can find the schedule in the airport or at the port where your ship has docked, often it is in a free magazine or newspaper.

Checking this schedule allows you to plan your trip better. You can avoid the tourist hot spots on the days the ship is in town, and hit those areas when the ship is gone. I did this on my trip and had Magen’s Bay Beach entirely to myself. Now I recognize this is a tip more for the folks spending a few days on St Thomas, but if you want to avoid crowds and you are on a cruise, you can visit some of the other gems listed below. Let all your cruise buddies go to the hotspots, while you sneak away to your own special places. Or don’t; I can’t tell you how to live your life.

Visiting the US Virgin Islands Image 3
Magen’s Bay

Beaches

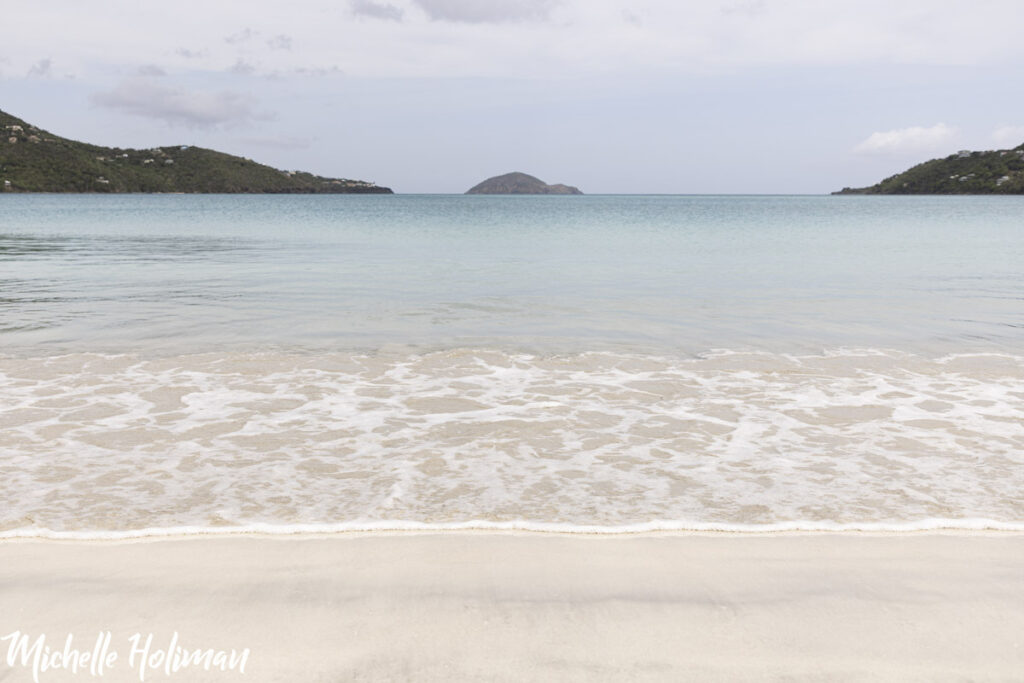
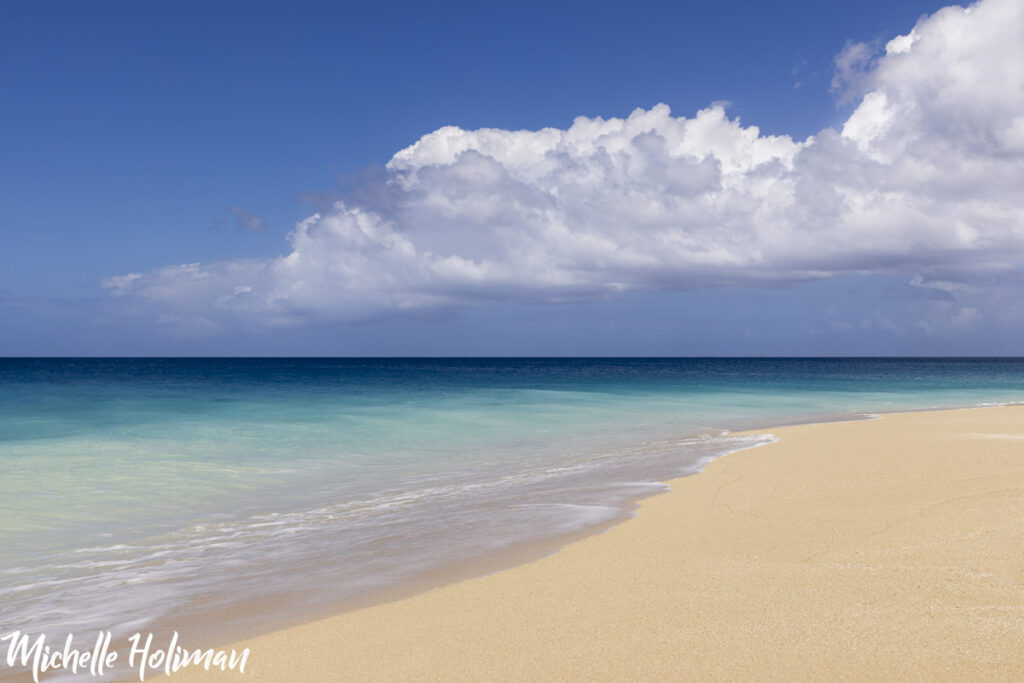
  • Magen’s Bay – often quoted as one of the most beautiful beaches in the world, this is not one to miss. If the cruise ship isn’t in, getting here at a reasonable time in the morning will reward you with an empty – or nearly empty – beach. I visited around 9 am in mid-May, and the beach was EMPTY! If you are visiting the US Virgin Islands, this is one you do not want to miss.
  • Sapphire Beach – like the name suggests, the sparkling Sapphire waters offer an inviting view for photos, and a refreshing spot for swimming.
  • Coki Point Beach – Music from the nearby beach bars bumps a fun and easy-going vibe that this beach is known for. This beach can get crowded, and is more of a party beach than other ones. It is right down the street from Coral World Ocean Park, which is a great spot for undersea lovers as it boasts an underwater observatory.
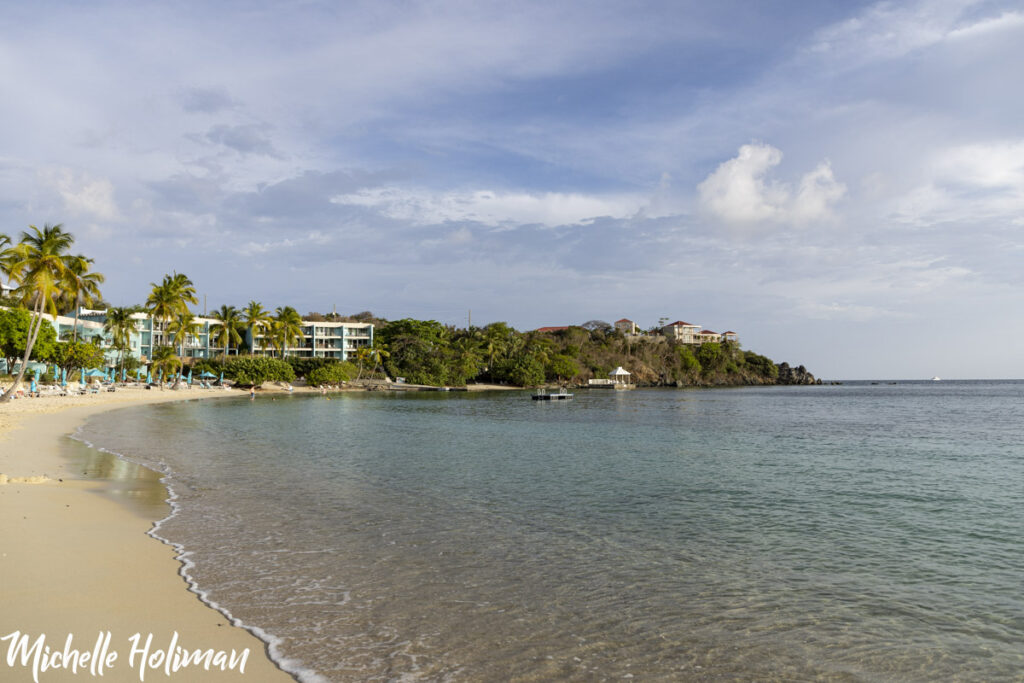
  • Secret Harbor Beach – More of a hidden gem, this less-visited beach is tucked away in a small secluded cove. This makes it a perfect spot to avoid crowds, and the snorkeling is pretty good on the rocky side of the harbor.
  • Lindquist Beach – I didn’t get a chance to see this beach, and I really wish I did! Many visitors name this as their favorite beach on St Thomas, and the photos I have seen look so beautiful. If you end up going to this one, shoot me a DM and tell me if you liked it!

Visiting the US Virgin Islands Image 4
View from Drake’s Seat

Views

  • Mountain Top – Home of the famous Banana Daiquiri, other than that, it is a great place to get souvenirs. The best part is the impressive view from the back patio! On a clear day, you can see the British Virgin Islands.
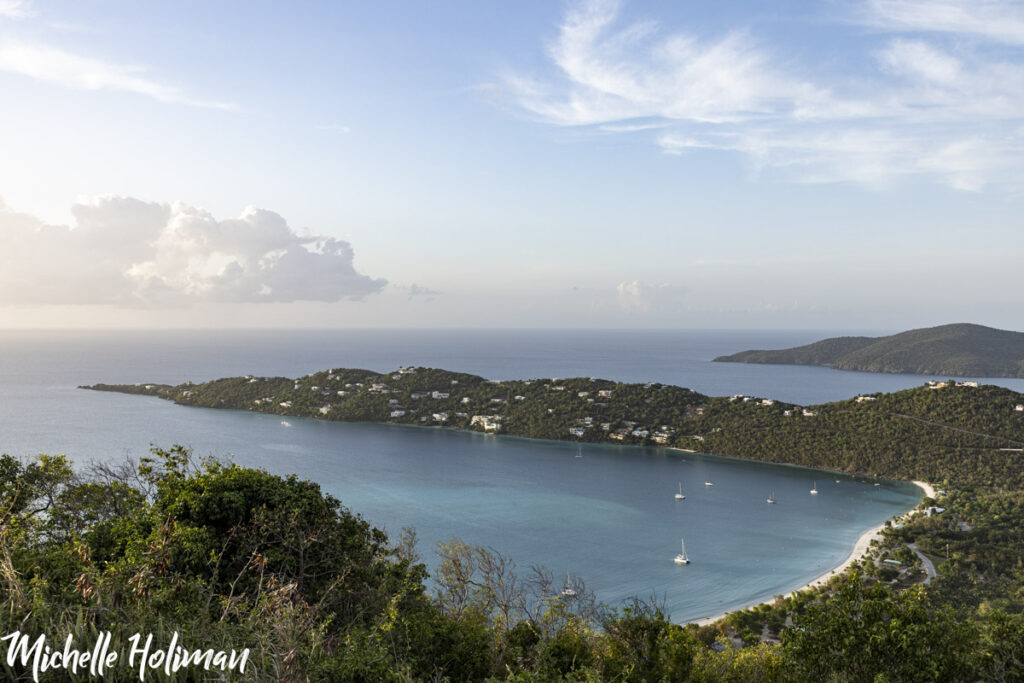
  • Drake’s Seat – this is a PERFECT spot to watch the sunset with a spectacular view over Magen’s Bay.
  • Charlotte Amalie Overlook – To see sweeping views over the entire city of Charlotte Amalie and the bay beyond, take a quick drive to this overlook point. This is a free spot to stop and take in the view, and it does have a decent amount of parking. It is basic as far as amenities go, but great for a quiet moment with a view.
  • Paradise Point Overlook – For another gorgeous view of the bay and Charlotte Amalie beyond, stop at this overlook. If you want a less basic experience, take the gondola up and add a dinner at the restaurant. Be sure to check the hours of operation before planning this one, as it might be closed if no ships are in town.

Visiting the US Virgin Islands Image 5
Fort Christian

Must Do

  • Historic shopping district in Charlotte Amalie – a perfect place to pick up cute clothes, unique jewelry, or have a tasty lunch!
  • Water Island – rent a golf cart IN ADVANCE and take it to the decommissioned fort at the highest point on the island, aka Fort Segarra. Finish the rest of your day spotting sea turtles at Honeymoon Beach (which is my favorite beach on St John.)
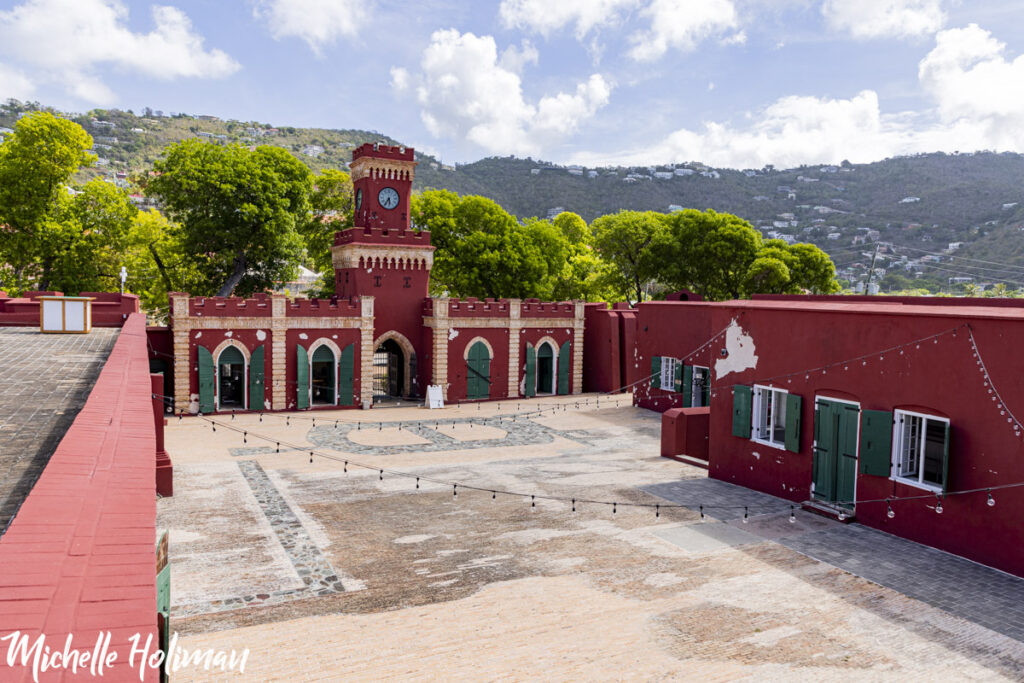
  • Tour Fort Christian – Visiting the US Virgin Islands can be just as much a history lover’s trip as it is a beach lover’s, and this Dutch-built compound is a significant part of St Thomas’ past. In the main building, you see beautiful recreations of rooms made for church gatherings, living areas, and governmental spaces. On the lower level is the dungeon – many enslaved people lived and died here. I loved reading about their stories, and learning more about St Thomas than taking it simply as a tourist destination. If you are open to feeling some things more than vacation vibes, take some time here.

Visiting the US Virgin Islands Image 6
Secret Harbor Beach

Food Worth Trying

If you are visiting the US Virgin Islands during peak season, it is a REALLY good idea to reserve a table in advance. This is especially true if you want to experience a specific restaurant. Tables fill up quickly, particularly if they have a beautiful view.

  • Taphaus – While maybe not a food place specifically, this bar is a great spot to stop, grab one of the MANY amazing drafts, and continue walking around the historic shopping streets in Charlotte Amalia
  • Side Street Pub – this is a GREAT taco spot, but it also has your typical pub food like burgers and adult beverages. Let me tell you, when you get off the plane hungry, a fish taco from here hits like no other food.
  • Greenhouse Restaurant – this one is a spot to go if you want some fun and cute restaurant vibes. It was also less busy than some of the other places the night I went, and not waiting in a line is a huge plus. I wouldn’t say the food was the BEST I’ve had, but it was pretty good.
  • Gladys Café – if local flavors are more your style, this spot is a MUST. From Conch Fritters (100% a must try) to specialty hot sauce (made in-house) this café is sure to delight.
  • Lanai Restaurant (at the Limetree) – just outside the main hub of Charlotte Amalie, this little restaurant has awesome views of the ocean, and is a great place to enjoy an evening drink. I was surprised at how good the food was too!
  • Sunset Grill at Secret Harbor – this spot is PERFECT for dinner while watching the sunset (as the name suggests.) For a spectacular afternoon, snorkel in Secret Harbor, dry off in the sun, and grab dinner here.

St John

Visiting the US Virgin Islands Image 7
View of Trunk Bay in St John

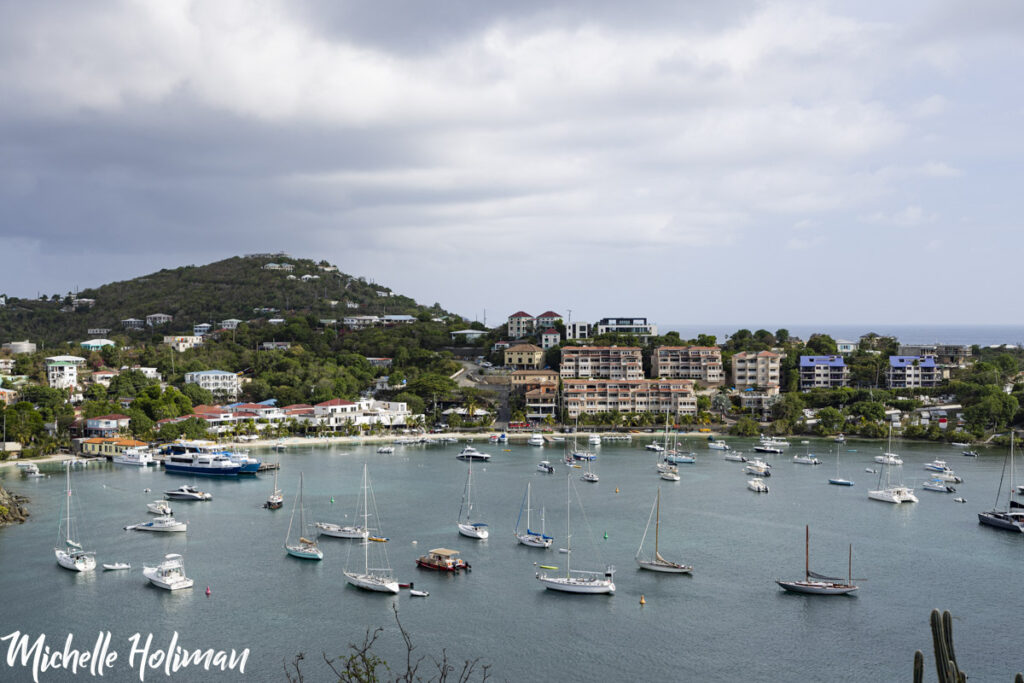
A quick 20-minute ferry ride from Red Hook lies the jewel that is St John. Roughly 60% of the island is National Park land, which makes St John an adventure lover’s dream. More rugged and significantly less developed as a tourist hotspot, this island boasts beautiful hikes, quiet beaches, and preserved historic sites. If you love the outdoors, this island should definitely be on your list when you are visiting the US Virgin Islands.

Except for Cruz Bay, much of the island is rural. This means many of the roads are steep and speckled with potholes, and many hotels and accommodations are located in one place. When I looked into booking a hotel, I was surprised at how limited the options were in comparison to St Thomas and how the prices were significantly higher. If you hope to visit St John on a budget, try booking during the off season or searching for Airbnb/VRBO stays outside of Cruz Bay.

As a heads up, if you book in a more rural area, be prepared for simpler accommodations. The trade-off in price comes with a trade-off in amenities like paved roads, accessible spaces, or even air conditioning. If that is not worth it to you, swing the extra and get a spot in Cruz Bay.

Visiting the US Virgin Islands Image 8
Palm Tree at Oppenheimer/Gibney Beach

Beaches

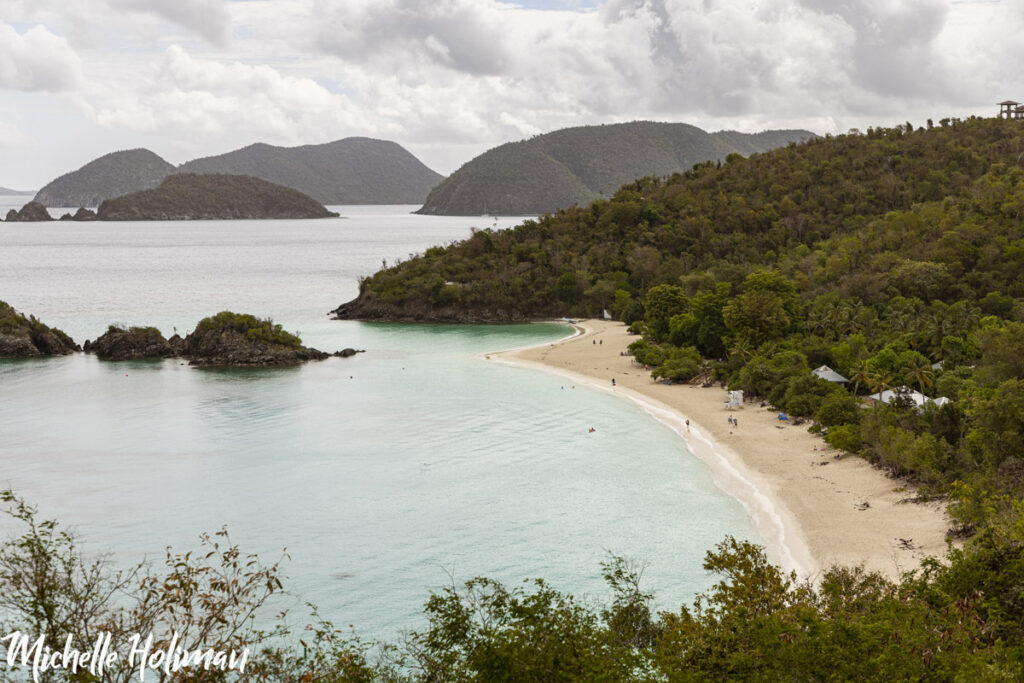
  • Trunk Bay – this beach was my FAVORITE on the whole island. While one of the most popular beaches, it is well worth the crowds. There is an entrance fee of $5 per person, but it is most certainly worth it. The sand is soft, the water is clear, and there is a snorkeling trail! I saw stingrays, nurse sharks, many tropical fish, and lovely corals here.
  • Honeymoon Beach (yep, same name as the one on Water Island in St Thomas) – This beach is accessible by hiking in the National Park via Lind Point Trail. Because of this, the beach itself was less crowded. We spotted sea turtles here over the seagrass fields. A hike and then a swim with sea turtles makes for the perfect half-day adventure.
  • Salomon Bay – further down the trail from Honeymoon Beach is Salomon Bay. Both of these beaches are a good choice if you want a more isolated beach experience. Many visitors don’t hike into this beach, so it is perfect for a secluded afternoon of relaxation and snorkeling. Plus, because it is less visited, you are more likely to spot wildlife. A win-win!
  • Cinnamon Bay – beautiful, pristine, and undeveloped (are you seeing a trend with these beaches?) This beach is one of the longest stretches of shoreline in St John. It also has ruins, both on the beach and via a hike into the lush jungle to see even more of the Cinnamon Bay Plantation Ruins. If a 2-mile hike is not for you. You can access the plantation ruins from a different trailhead, which turns the adventure into a walk rather than a hike.
  • Maho Bay –  another great and popular beach, perfect for relaxing and spotting sea turtles. There is an area with a selection of food trucks and beach bars, making this area a great spot to stop for lunch after relaxing on the beach.
  • Oppenheimer/Gibney Beach – this spot goes by two different names and requires a little hiking to get to. Because of this, it was less busy than the 3 larger beaches (Trunk, Cinnamon, and Maho.) This beach became iconic for the tire swing attached to a low palm tree that extends out over the ocean. I learned after visiting that the tire swing had been knocked down during a storm, but the palm tree is still there. This is a great spot for a photo.
  • Hansen Bay Beach – on the far east end of the island, this beach was one I had entirely to myself. During the day, there is the opportunity to rent a paddleboard or kayak and explore the calm waters. As a heads up, this is a free beach to visit, but it is a family-run spot. The family will often introduce themselves to you, showing you the rental opportunities and inviting you to enjoy the beach. There is a donation box at the entrance, with all donations going to the care and upkeep of the beach. The family is super sweet and they work hard to maintain the beautiful beach. Consider dropping some money into the box if you are able!

Visiting the US Virgin Islands Image 9
Cruz Bay from Lind Point Trail

Views

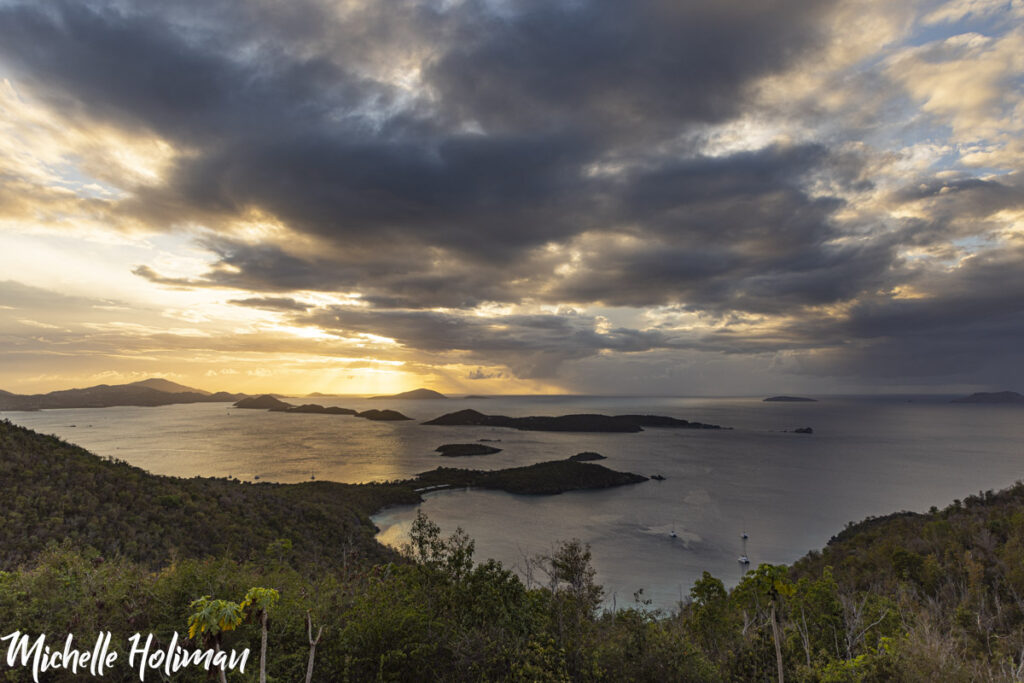
  • Lind Point Trail Overlook – a quick side trail, this viewpoint excellently showcases the entirety of Cruz Bay. The drop off is pretty steep, so views are unobstructed for miles and miles.
  • Peace Hill Trail – a short hike with two amazing views. Once at the top, you can explore the ruins of the Peace Hill Windmill and take in the sweeping vista. On your left (to the west) is Hawksnest Bay, and to the right (the east) is Trunk Bay.
  • Coral Bay to East End Drive – steep, but not too technically challenging, this drive brings you up and over the spine of a high mountain. From the top are incredible views of the ocean on each side of you. This is a great way to enjoy the views without hiking.

Visiting the US Virgin Islands Image 10
Catherineberg Ruins

Must Do

  • Hit up the National Park – check this spot off your National Park Bucket List and enjoy the amazing hikes and views this area has to offer. If you plan to hike Reef Bay, there is the option to take a boat back from the beach through the National Parks Service. This is limited to specific days of the week. Be sure to check the visitor center to help plan your trip accordingly
  • Annaberg Sugar Plantation – not only are the views from Annaberg incredible, but this area is one of the best preserved plantations on the island. While the architecture that remains is beautiful, this spot intentionally showcases the dark past of sugar cultivation and enslaved peoples. Much like Fort Christian, this spot is worth seeing and honoring the people upon whose labor and suffering built virtually the entire sugar industry. I deeply believe that if you are visiting the US Virgin Islands, you should take some time to experience this history.
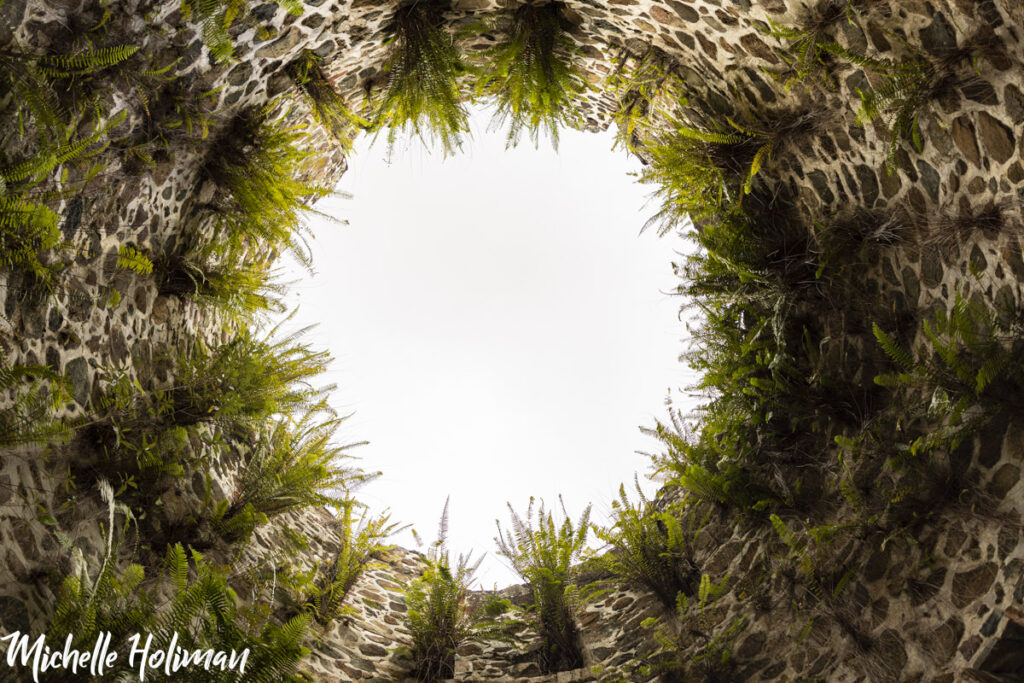
  • Catherineberg – another beautifully preserved windmill. This spot is much less visited than Annaberg. Though it is smaller, it has its own unique value (hence its appearance on this list.) I particularly love looking through the cone of the windmill and seeing the ferns growing in the crevices. This makes for a lovely photo.
  • Francis Bay Trail – This trail is not for everyone. It is beautiful, don’t get me wrong! I did the loop to explore the boardwalks, the ruins, and do some birdwatching. In this regard, this trail DELIVERS, but some say it was a little less cool than other spots on the island. If nature walks aren’t your thing, this is an easy one to skip. There is a great side trail that leads to Francis Bay Beach, which is the perfect spot for a picnic.
  • Mumbo Jumbo – for reasonably priced clothing and souvenirs, this spot in Coral Bay is a TREASURE. Seriously, I am not a huge shopper, but I had so much fun looking through the cute selection of things.

View from The Windmill Bar

Food Worth Trying

Plan ahead when visiting the US Virgin Islands! If you are like me, you plan on packing snacks for your hike (trail mix, granola bars, etc.) Know that if you buy these on St John, they will be more expensive. Most of these items must be shipped in, thus driving the costs up. Save some money by bringing necessities like this in advance.

Another important side note before I dive in!

Mongoose are a regular part of the island’s wild population. They are clever, smart, and sneaky. You don’t believe me?

I had two granola bars and 2 small bags of almonds at the bottom of my clipped shut, roll-top backpack. This bag I left on a secluded beach and underneath a beach towel, before snorkeling for 15 minutes. In that timeframe, two mongooses moved the towel, unrolled one side of the backpack top, dug through ALL of the other things in the bag to the bottom, and ripped the snacks to shreds. By the time I got back to the shore, they were squeaking and quarreling over the last granola bar. I was shocked and had to do the cleanup of shame, looking at the carnage of ripped-up wrappers.

The moral of the story? SECURE YOUR SNACKS! Put them in a compartment that zips up. For enhanced safety, lock them in a safe and bury that in the ground. Hopefully, that is enough to deter these crafty creatures.

Funny story over, now onto the recs.

  • The Windmill Bar – the food here is probably a 7/8 out of 10, but the vibes are a 10, and the Views are a 12. Try to get here right when they open for lunch to grab a spot at the edge of the patio. They often have live music too!
  • The Beach Bar – a great spot to watch the sunset! The food is basic – nachos, tacos, burgers, and fresh fish – but it is pretty good!
  • St John Brewers – A great spot for locally brewed drafts and good food! The vibe here is nice, and the air conditioning is a welcome reprieve on a hot day.
  • Sun Dog Café – nestled in Mongoose Junction, this is a great spot to stop after perusing the surrounding shops. On a nice day, sitting under an umbrella and eating a fish taco is hard to beat.
  • Skinny Legs (in Coral Bay) – Trying a Painkiller is a must when visiting the US Virgin Islands, spot is said to have the best. While many places claim this on their menu, I have to agree that the balance of flavors that Skinny Legs has in their painkiller is my favorite. The food is good too, and the vibe is laid back and fun.
  • Lime Out – this is only accessible by chartering a boat or taking a tour that drops you off, for a really specific reason. This restaurant is floating in the middle of Coral Bay. Tacos? Floating over the water? Yes. This is a truly unique experience.

St Croix

Frederiksted Pier

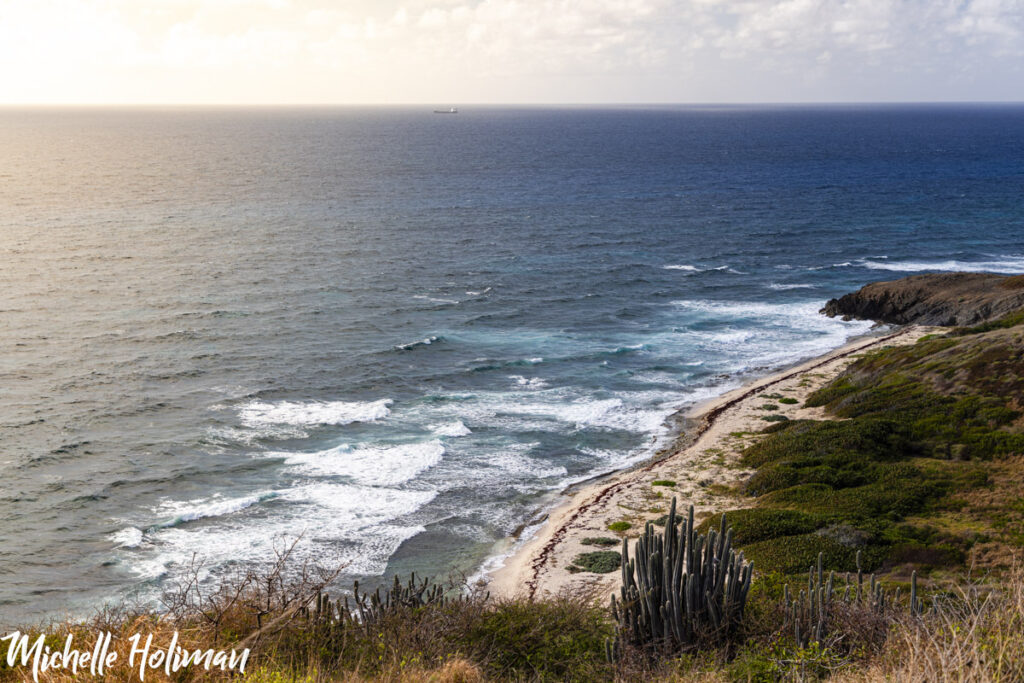
The 3rd island in the US Virgin Islands is the proverbial chill older brother – St Croix. It is the least developed of the three islands, but it is full of rich history, sparkling beaches, and enjoyable experiences. Add this to your itinerary if you have a little more time when visiting the US Virgin Islands.

Of the three islands, St Croix felt the most laid-back and easygoing. You miss out on the hustle and bustle of St Thomas, and there is more land mass to spread out on than on St John. Now, onto the recommendations!

Sandy Point Beach

Beaches

  • Sandy Point Beach – this is perhaps the most important read if you plan on visiting the US Virgin Islands. Sandy Point is a national treasure in my humble opinion. This beach is primarily a national wildlife refuge. Like most protected areas, human access is limited. Always closed April – August to create a safe habitat for nesting sea turtles. Outside of this timeframe, it is ONLY OPEN on weekends. Plan your trip accordingly. Fun fact about this beach: Castle Rock Entertainment filmed the final scene of The Shawshank Redemption here.
  • Cane Bay – this was the BEST snorkeling on the island itself in my opinion. There is a chance of seeing eagle rays here, but the coral garden is gorgeous on its own. I saw sea turtles and barracuda here too!
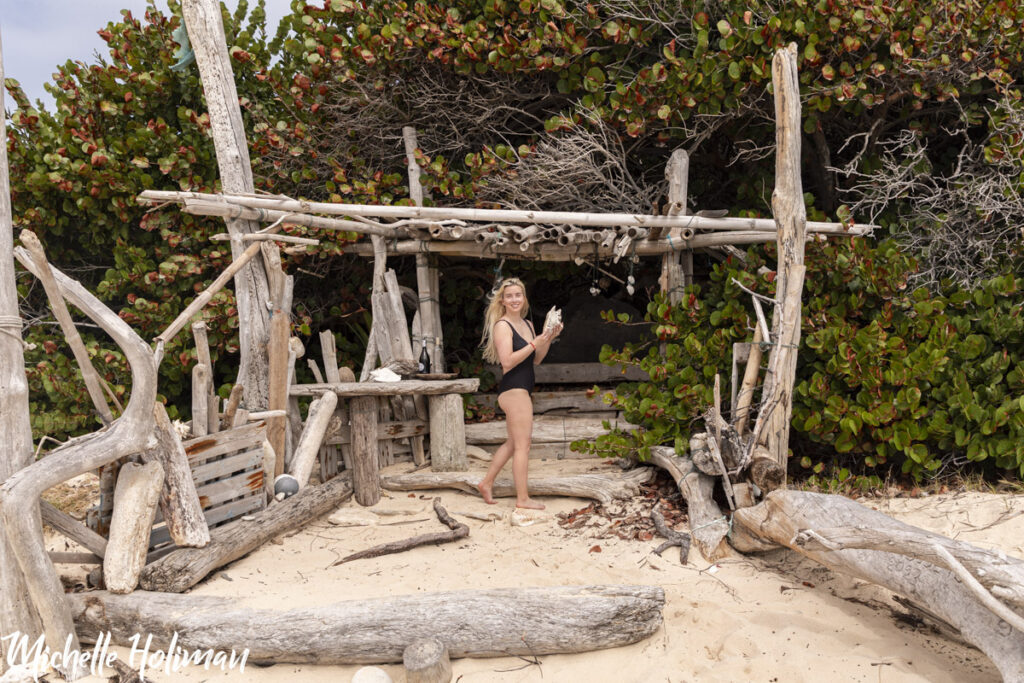
  • Jack and Isaac’s Bay – accessible by a hike from Point Udall, these two beaches are lovely spots to hang out and relax. There are many driftwood shelters that make for a great photograph. The hike isn’t terribly tough, but it can be a little challenging in certain spots.
  • Frederiksted Pier – this is not a sandy beach to relax on, but it does have incredible snorkeling and scuba diving. I particularly liked paddling around the older pier supports, but swimming under the main pier is fun too. Plan this in advance as well – if there is a cruise ship docked, you cannot snorkel here.
  • Protestant Cay – a quick $5 ferry ride from Christiansted to Protestant Cay will reward you with a lovely beach. With a bar bumping music, and a great Barbecue spot, the fun vibes of this beach are tangible. As a bonus, if you stay at the hotel, the ferry ride is free, and you can relax on the beach after everything has closed and the world is quiet and dark.
  • Rainbow beach – this gorgeous beach is close to the pier, so it can be quite busy when a cruise ship is at the port. The fun vibe and sparkling waters are a great stop for the afternoon, and the restaurant on the beach is quite good.

View from Point Udall

Views

  • Point Udall – panoramic views of the surrounding ocean and a unique sundial monument make this a truly unique viewpoint. It also connects to Jack’s and Isaac’s bay via a nice hike. Visit this spot in the morning, enjoy the hike down, and be back in time for lunch!
  • Drive around Salt River Bay via Northside & North Shr Road – as the road climbs higher, you get a nice view of the ocean and Salt River Bay

Visiting the US Virgin Islands Image 15
Annaly Bay Tide Pools

Must Do

  • Buck Island Day Trip – I traveled to Buck Island with Big Beard Tours, and I can say that this was the Highlight of my St Croix trip. Buck Island is a national monument, with the majority of the protected land under the water. While Cane Bay had the best snorkeling on the main island, Buck Island had the best snorkeling in the entirety of the US Virgin Islands (in my opinion, of course.) After the cruise, exploring the beach, and snorkeling, you finish off with a really good barbecue lunch – the mahi is to die for – before cruising back.
  • Dive the Cane Bay Wall – if you are a scuba diver, you probably have heard of The Wall at Cane Bay. With a 1,400 drop, this is a diver’s dream spot. I did not personally do this dive, simply because of time constraints on my trip, but I will 100% do it when I go back. If the diving is anything like the snorkeling (which I have been told is even better), this is an adventure not to be missed.
  • Tour the Cruzan Rum distillery – while I am a lightweight when it comes to alcohol, and as such, I don’t drink a ton, this tour was fascinating. It was super cool to learn the history of rum, the distillery, and see firsthand how it is made. I really didn’t expect to like this tour as much as I did. The tour concludes with a rum tasting and two cocktails of your choice!
  • Bioluminescent Bay Kayak Tour – PLAN AHEAD!!! You can only do this during darker moon phases, but if you can swing it, this is a SPECTACULAR experience. I am so grateful for the jellies and dinoflagellates that make this water sparkle bright blue when you paddle through it. While this is hard to photograph, the experience is top-notch. I recommend going with Bush Tribe Eco Adventures and getting the clear kayak so you can see the bioluminescent activity as you glide over the waters.
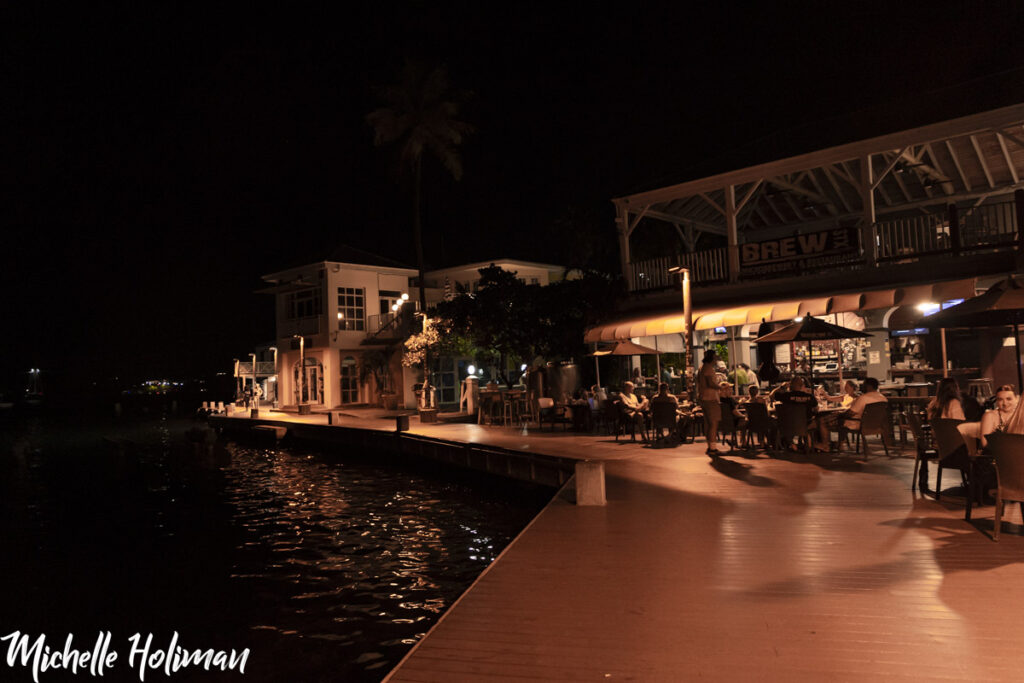
  • Stroll the Christiansted Boardwalk – from cute shops, to bars, and tasty restaurants, this free activity is a great way to get a feel of the city. At night, buskers play music, and lights from the buildings sparkle over the ocean. Keep an eye out for the huge tarpon swimming right along the boardwalk!
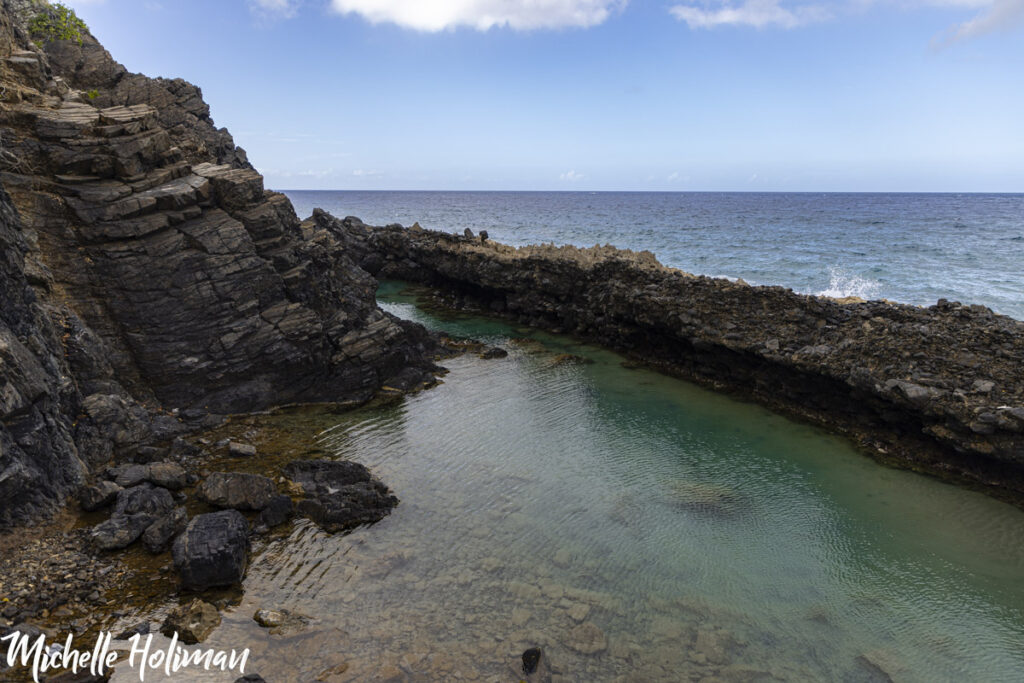
  • Tide Pools at Annaly Bay – for those who love to hike, this is a GREAT trail. This sub-3-mile hike rewards you with massive tide pools perfect for swimming. The climb over the rocks from the beach is not for the faint of heart. Bring hiking shoes!

Visiting the US Virgin Islands Image 16
Plentiful food places on the Christiansted Boardwalk

Food Worth Trying

  • CHUPACABRA TACOS – Of all the food I enjoyed in St Croix, this was my all-time favorite. With homemade tortillas, fresh fish, and slow-cooked meats, Chupacabra’s is a mouthwatering, hunger-satisfying, star-eyed emoji experience.
  • Hamilton’s – for an upscale meal in Christiansted, look no further than Hamilton’s. Be sure to reserve a table in advance; this place is small, so it fills up quickly. You may get lucky like I did and grab a place at the bar, but this isn’t a guarantee. This spot is perfect for a fancier date.
  • The Mill Boardwalk Bar Brick Oven Pizza – wood-fired pizza and good vibes in this small, open-air restaurant right on the Christiansted Boardwalk.
  • Shupe’s – great views, right on the boardwalk, and reasonably priced. Enough said!
  • Virgin Islands Coffee Roasters – for great quality coffee and breakfast, this and Rouge Café (down below) are hard to beat. As coffee snobs, my husband and I rated the two. For black drip coffee and pastries, Virgin Island Coffee Roasters is a winner.
  • Rouge Cafe – If lattes and artisanal breakfasts are more your style, this is the place to go (beating Virgin Islands Coffee Roasters in these categories.) The hummus toast was especially delicious. I loved the interior design of this one as well.
  • Ama at Cane Bay – Outside of Christiansted, this restaurant has upscale prices, decent food, but the views are spectacular. When booking in advance, book the Ocean Side Grotto Seating for around sunset and have the most scenic dinner ever.
  • Sion Farm Distillery – home to the small but popular Mutiny Island Vodka brand, the food here is good and at a good price. Plus, you can catch a free tour of the Distillery after your meal.

Thank you so much for reading! This has been your Ultimate Guide to Visiting the US Virgin Islands! Share this with your travel buddy and, as always, happy traveling!

Save this for later on Pinterest!

Image that says "Visiting the US Virgin Islands - The Ultimate Guide"

What Clothes to Pack for Your Norway Trip

Affiliate Disclosure: This blog post contains affiliate links, which means I may earn a commission if you make a purchase through some of these links. There is no additional cost to you, and I only recommend products and services that I genuinely believe will add value, especially when you are choosing what to pack for your Norway trip. Thank you for supporting my blog!

What even are people wearing to Norway? I remember checking the weather for my trip in May to find sub-freezing lows, but highs of 65℉ (18.3℃.) One thing is for sure, Norway has got range. This large difference in temperatures opens the door for a lot of questions. What should I wear hiking? Will it be warm enough to swim? How much should I pack to keep warm? I have learned that poor planning can really ruin a trip, and with that in mind, I felt I should make a blog post dedicated to what to pack for your Norway trip! After tons of research, and then personally testing out items, I found a few things I was so grateful to have, and some things that never made it out of the suitcase. There is even a lil packing checklist I made just for you at the bottom of the page. Let’s dive into exactly what to pack for your Norway Trip!

Suit Up

Preparing for the elements might vary from breezy T-shirts to puffy jackets – all within the same day. The best decision? Layering. I know it is cliché, but taking off layers when you are hot or insulating when you are cold can make a tough hike significantly more comfortable, especially when you get hot during the uphill, but cold at the top. Here is what to look into so you can have the best experience

My number 1 favorite thing – seriously, I cannot give it enough hype – Merino Wool Baselayers

Did anyone else have the experience as a child of getting thermal underwear and it being itchy, uncomfortable, and WAY too hot? Imagine all of those problems floating away 😌 🕊️ If that sounds good to you, you will LOVE Merino wool base layers. They breathe, wick sweat, don’t smell, keep you at a perfect temperature, and are so freaking comfortable. I am convinced that it is because of magic that these work so well. If there is any article of clothing whose praises I will sing from the mountain tops, it is these.

The only downside is that they can be a little pricey, but they do go on sale quite often. I bought the top and bottoms at the end of winter for between $60-$70 each. If you aren’t in a rush, wait for a good sale! Here is another well-reviewed pair that is a little less expensive if you want options. Not to be dramatic, but they might just change your life – or at least change the way you hike in cold weather. This is for sure one item you should pack for your Norway trip.

Mid-Layers

Michelle in heavy duty winter gear in Svalbard

For your mid layers, you will want something with minimal bulk so wearing an outer layer will still be comfortable and non-constricting. I used some of my long-sleeved tops from home, as well as some lightweight pullovers. You can also get a fleece vest if you are going further north where temperatures are extra cold. I ended up leaving a fair amount of my hoodies and sweaters at home for one very specific reason: Scandinavian Sweaters. This is my very favorite souvenir that I picked up in Norway. They are usually made with 100% Norwegian wool and made entirely in Norway. I have got to say that these are WARM! Plus, there are many unique and beautiful patterns to choose from. I got mine from Dale of Norway and I absolutely love it. They are well worth the price.

One thing to remember here is where you can layer up. For the coldest days, I had my base layer, a pair of jeans, and a pair of looser hiking pants over the top of those. Adding in a pair of gloves and a hat (both of which I forgot and bought in Norway) is a lifesaver. The other amazing thing I was so grateful I had was a nice, warm scarf. Especially in the Svalbard portion of my trip, the chill wind was especially hard on my nose and cheeks. It was so helpful to have a scarf that I could loop around and cover my face. I seriously considered bringing a balaclava, but I ended up leaving it at home. I would 100% recommend one if you venture far north and earlier in the year than I did. A thick pair of wool socks paired with my hiking boots were incredibly nice to have as well.

Outer layers

Cameron in a heavy winter coat

A few things to consider when choosing an outer coat are warmth potential and wind & rainproofing abilities. Let’s talk about both of these 👇🏻

Warmth Potential

When I started researching, everywhere I looked talked about how Down is the very best insulator out there. It tends to be:
1.) More breathable than synthetic-filled jackets, which is a huge plus for hiking.
2.) Lightweight, less bulky, and more compressible which is important when you have to prioritize every inch of space in your travel bags
3.) Fairly Durable. While water can compress the fluffiness (known as loft,) down jackets are, overall, pretty long-lasting and considered a good investment.

Now, if you spend any time looking at down jackets, you will come across the term “Fill Power” with an associated number. Usually, the number is between 500 and 800 and is simply a unit of measure for the quality of down used which directly impacts how warm the jacket will be. Generally* the lower the number, the less insulating; the higher, the more insulating. For context, I used a down jacket with 600 Fill Power and it did the trick for me, especially when paired with underlayers.

*Some coats can weigh more with a lower-rated fill power and are still warm simply because the coat is stuffed with more down. Be sure to compare the coat’s weight and the fill power if you are particular about your insulation.

Wind & Rain Proofing

The other thing to know about down jackets is that the feathers do not do well if they get wet. They will pack down, cling together, and fail to insulate you effectively. If you plan on being in a wet climate, be sure to use a waterproof outer layer or pop a raincoat on over your down jacket. I cannot emphasize enough the power of a good rain jacket. Seriously, it rains a lot in Norway and it was a lifesaver for me to quickly put one on while it was pouring. If you are layering a raincoat over your heavy jacket, you may want to go up a size when you purchase.

The time of year I visited was May, and I did not pack an intense outer layer for my legs such as snowboarding pants or a snowsuit. This was partially because I didn’t have enough space, and I only own a lightweight pair. With my base layer, long socks, jeans, and hiking pants over the top, I didn’t ever get miserably cold. In places like Svalbard, certain tours supply you with warm-weather gear. If you want to book a tour, keep an eye out for this detail.

Michelle in hiking clothes in the lofoten Islands of Norway

I didn’t even think about that!

When you choose what to pack for your Norway trip, some things are obvious – socks, underwear, etc – so I won’t waste your time reminding you to bring them. However, some things make a huge difference in your trip that might take you by surprise. Here are a few of mine:

  • Dark Eye Mask. If you go to Norway during the summer, you will experience extended hours of daylight and Midnight Sun. Having an eye mask can make a huge difference in your quality of sleep!
  • Swimsuit. In the land of snow and mountains? Yes! The number of beautiful lakes and fjords available to swim in is substantial. The water will probably be cold, but it is absolutely refreshing. Additionally, a sauna is a true Scandinavian experience, but some may require a swimsuit.
  • Sunglasses. Trust me on this one, especially if you plan on hiking in snow. On a bright day, the snow was so reflective that I found myself squinting. One of our tour guides mentioned that she gets headaches if she doesn’t wear sunglasses and is out hiking all day. I didn’t have to test this one out thankfully.

What to skip

Hey Michelle, what about the fancy stuff? I am so glad you asked! From time to time, I have packed a really elegant outfit for photos at the top of a mountain. I can safely say that this didn’t happen during this trip. I think this is partially because getting to the top of a mountain in Norway requires Maximum Effort™️ and I wanted to keep my hiking backpack as dialed in as possible. While I love the idea of a photo like that, it wasn’t one of my goals for this trip (though I do admire anyone who accomplishes this feat.) In this same line of thought, there weren’t many places that had an upscale dress code. Much of the activities in Norway – at least, the ones that drew me in – are outdoorsy. If I had to choose between packing a pretty dress or making sure I had space for a puffer coat, I would choose the coat. That isn’t to say you can’t pack something nice! If you plan your trip well, and around the activities you enjoy, you should be able to pack whatever outfits support that desire.

Person in a raincoat with an umbrella walking the streets of Bergen, Norway

Final Thoughts

Choosing what to pack for your Norway trip shouldn’t be a stressful thing. Keep the goal of staying warm, dry, and comfortable at the forefront of your mind and you will be totally fine! Whether you are walking the colorful streets of Bergen, or hiking the peaks of Svalbard, the right attire can enhance your experience. Especially in Norway, the experience is everything! If you want a free packing list to get the creative juices flowing, tap the link below. Happy traveling!

My Complete 2-Week Itinerary from my EPIC trip to Norway

Hey all! I had a lot of people asking for my specific itinerary from my trip to Norway. Knowing what I like when reading an itinerary, I made it short, sweet, and with minimal side notes. This is also the honest version of where I went and what I did – both the exciting and the “change-of-plans” experiences. When inclement weather or closures happened, I wanted to incorporate what I would have done or other suggestions for you to help plan your trip. There are also helpful links to hotels, companies, or businesses that I visited while there. If you have any questions, feel free to leave a comment or shoot me a DM on Instagram!

Enjoy!

The Famous view of Bryggen, the centuries-old wooden buildings on the wharf

Spot #1 Bergen and the Fjords

Day one

Arrived at Bryggen at 1 pm and dropped off luggage

Walked to the famous fish market (got some delicious fish soup and fish and chips) and explored the market

Explored the shops and alleys at Bryggen

Walked to the side around of the harbor facing Bryggen, got some photos

Explored the surrounding streets, enjoying the art and architecture 

Fought sleep, but began losing. Headed back to Airbnb

In bed at 7:40 pm

Day 2 – explored the town

The streets of Bergen are so beautiful in the springtime

Slept in 👏🏻👏🏻👏🏻

Had breakfast at Gødt Brød (Good Bread)

Explored and learned some history at Rosenkrantz Tower and Håkon´s Hall 

Went to a free art gallery (it was so-so) called KRAFT 

Checked out more shops and art stores/galleries at Bryggen 

Visited Byparken and took pictures of the flowers, statues, and National Theatre, then checked out the neighboring shops

After dinner (of kebab 😋) went by No Stress for drinks and to play Mario Kart (unfortunately the chord in the N64 was not working, so we hung out and chatted.)

Watched the sunset around Bryggen (absolutely beautiful)

Day 3 Norway in a Nutshell (book tour here)

Seeing a fjord by boat is nothing short of spectacular

Hopped on the Bergen Train at 7, enjoyed the views

Hopped on the famous Flåm Railway

Had 1:30 to explore Flåm, bought some Scandinavian Sweaters and ate lunch, loaded the bus for Stegastein Viewpoint 

1:30-minute tour to Stegastein Viewpoint 🤩

Got back, did a 1-hour hike at the Nature Trail – ate a delicious cinnamon custard Bolle

Get in line for the boat 15 minutes early (note where the captain is facing and grab a spot by the rail facing the same direction. 

Fjord cruise of Nærøyfjord (a branch of Songefjord)

Bus back (stopping at the panoramic hotel along the way)

Tacos and a lil ice cream after dinner at the wharf

Picked up muffins from the 7/11 for a to-go breakfast for tomorrow 

Day 4

Quaint little cities fill the valleys and make for amazing photos!

Catch the early bus to Norheimsund, and get out at Steinsdalsfossen to have the whole waterfall to yourself (before the tour busses come in!) 

Walk 35-45 minutes to Norheimsund (taking in the beautiful scenery along the way)

Stop for coffee and a view at Kaffe Kap

Stroll to the Hardanger Fjord Adventure – 1:15 minute high-speed Fjord Safari

Catch the bus back to Bergen

Hit up the Maritime Museum before they close (I wanted to learn about the Viking history of the area, this was a great option, but it also showcases the history of boats and Norwegian Seafaring) 

Enjoy a loop around the large lake at Fyllingsdalen and climb through the trees to find the rocky outcrop over the lake

Pop back to Bryggen for a classic Beer Garden experience, enjoying the sunny outdoors (food available as well)

Go to bed because exhaustion has hit pretty hard

Day 5 

Be prepared for a little scrambling on this hike

Wake up early and grab breakfast at the bottom of Mount Fløy (Floybannen Funicular)

Ride the Funicular up to the top

Visit the goats to the right of the funicular exit first, then start the Vidden hike

Hike and hike and hike for about 6 hours (don’t forget Kvikk hiking chocolate! 🍫)

Eat a late lunch at the Ulriken Cafe

Take the Ulriken Cable Car down and catch the bus to City Sauna

2 Hour Sauna cruise (for two 💕)

  • melt in the sauna
  • Cold plunge in the fjord 
  • Drink LOTS of water
  • Vibe with your music 
  • Pick a favorite essential oil to add to the sauna water

Feel AMAZING after

Dinner at Olivia (pizza and focaccia were so good)

Pack up and go to bed

Spot #2 Longyearbyen, Svalbard

We asked our tour guide if we could stop at one of these signs!

Day 6 

Haul everything to the station and catch the flight to Longyearbyen (Svalbard)

Beer tasting at the Svalbard Bryggri

Dinner at Svalbar 

Day 7

Walruses are a new favorite animal of mine

Walrus safari with Better Moments tour company (lunch on the boat)

Dinner at Nuga Sushi 

Guided evening hike to the Global Seed Vault with Snow Fox and then to the top of Blomsterdalshøgda for great cardio exercise and even better views

Watch the Midnight sun from the beach 

Go to bed INCREDIBLY tired

Day 8

View from the top of Blomsterdalshøgda

Guided nature hike into Bjordallen with Snow Fox (see Arctic foxes, Svalbard Reindeer, and a plethora of wild birds.)(lunch on the hike)

Svalbard Museum (to learn the rich history of the area) (we had to choose between this and the coal mine tour and ultimately chose this option, but you could easily swap out this choice if you wanted to see Mine Number 3)

Dinner at Saenphet Thai in the shopping center (really pretty views of the street from the main window)

Day 9

The iconic Rorbus of Hamnøy

Pack up and check out of hotel 

Walk the city shops and pick up souvenirs 

Husky Cafe 😍 pet the pups and drink some tea 

Catch the bus to the airport

Quick Tour Company Notes:

If you want to go outside of the city limits, there is a very real possibility of running into a polar bear (there are signs at a few points outside of town warning you of this.) Because of that, it is not wise to leave town without a guide, or unprepared to scare off a polar bear (most of the time this is done with a flare gun, but all locals carry guns for worst-case scenario situations.) Tours are what 99.99% of visitors do to explore outside of Longyearbyen. I loved both of the companies listed above, they were by far some of the best tours I have ever been on as far as quality of information, structure of the tour, and genuine friendliness and character of our guides – some of which I am now friends with on Instagram. 

It should be stated that the odds of seeing a Polar Bear are INCREDIBLY low, but there is a long history of people being hurt or killed by bears since the discovery of Svalbard – one incident happening as recently as 2022. Going with a guide is the best way to explore and stay safe.

Land in Lofoten, pick up car and drive to Eliassen Rorbuer in Hamnøy

Watch the sunset

Spot #3 Southern Lofoten Islands

Day 10

While normally a parade only for children, the Lofoten Islands Constitution Day parade is open to all!

Constitution Day – most everything is closed to celebrate

Pick up breakfast and a few groceries at the Circle K 

Stop by the Lofoten Store for souvenirs and information (specifically for Constitution Day)

Walk in the Constitution Day parade (from Moskenes to Sørvågen)

(This was kinda specific to our trip, feel free to take this time to go for a drive, hike, or on a fun tour. Some ideas to get you going – sea kayak in Reine Bay, drive the E10 in either direction and check out the lovely beaches, or take a tour to see Sea Eagles!)

Get lunch at Tapperiet Bistro (fish and chips and fish of the day were both EXCELLENT)

Climb Reinebringen (about 3-4 hours) eat some hiking chocolate and enjoy the view from the top 

Rest and enjoy dinner at home

Day 11 

These massive racks can dry hundreds of fish at a time

These next two days had really bad weather. Because many of the hikes are up mountains and fairly exposed and slippery, we had to change our plans. I’ll include a list of hikes in case you have nice weather and want to get outside at the bottom of this page.)

Drive to Å and explore the cool coastline, and get a cinnamon bun at the bakery 😊

Take the E10 to Leknes – stopping at pretty places for photos along the way 

If you are in the Lofoten Islands from late winter to late spring, you will probably see the racks of dried fish, most of which are Cod. These are super cool to walk under and get a closer look at the unique, no-salt drying method that fishers have used for hundreds of years to preserve their precious fish.

Lunch at the mall plus quick shopping for gifts

Visit the Lofotr Viking Museum (the chieftain’s longhouse was particularly cool.)

Drive back, hitting up the beaches and/or side roads along the way, and really get into the spirit of exploration and adventure

If you want to get back quickly, you can do the afternoon sea kayak, we wanted to do the evening one, it gets done at 11:30 pm or so

Walk to Saga Lofoten for a 3-hour sea kayak

Day 12

This fishing village shows what life was like over a century ago in the Lofoten Islands

Drive to Nusfjord and check out the historic fishing village. Be sure to visit the panoramic viewpoint and – for even more adventure – walk out to the small lighthouse at the end. 

Have a late lunch (the pizza restaurant opens at 3 and quickly gets busy. If you for sure want a spot, make a reservation, or hope you get lucky and they have room. The Pear Cider was excellent!

Enjoy the drive back, stopping at side roads, and seeing what cool things you can discover. If the weather is good, consider a hike!

Light Dinner at home 

Day 13

“What do we say to the God of Death? Not today.” -Game of Thrones

Wake up early and head to Ryten Trailhead (grabbing cinnamon buns at Anita’s along the way. If you feel up to it, they have excellent Stockfish, be brave and give some a try)

Climb the mountain! (Plan on closer to 4 hours for the direct route, and if you want to take the route to the beach, add on an extra hour or two)

Lofoten Hiking list:

  • Bunes Beach + Helvetestinden (need to take a ferry)
  • Hermannsdalstinden (hardcore)
  • or just to the Munken stop if you want to not be intense hiking all-day
  • Horseid Beach 
  • Kvalvika Beach to Ryten Mountain 
  • Reinebringen
  • Tindstinden
  • Håen (on the next island over, accessible by plane or ferry)
  • Veggen
  • Delp

Beaches to see

  • Kvalvika 
  • Horseid
  • Bunes
  • Skagsanden
  • Hauklandstranda
  • Unstad (for surfing or surfer watching!)

*Now it is time for a gentle observation. I love to travel, but it doesn’t mean every single trip has perfect choices and outcomes every time. Take what you need from this next section, knowing that this much travel all at once was exhausting. I will probably make another post on how to survive a crazy amount of flights or long-leg flights, but that is not the purpose of this particular post. A little exhaustion keeps you young, right?*

Catch the flight out of Leknes to Bødo, then Bødo to Bergen. Check into the Bergen Airport Hotel and catch about 4-6 hours of sleep

Day 14

Pop on the 6:20 am flight to Frankfurt, then the 11-hour flight to San Fransisco, before taking the final flight home to Salt Lake City. Feel accomplished for taking a 5-flight adventure, then sleep for about 14 hours.

That is the whole epic adventure! If you have other questions about my trip to Norway, please don’t hesitate to reach out! Send me a DM on my Instagram or leave a comment. I have a highlight story saved to my Instagram page if you want to experience the whole amazing experience – check it out! Happy traveling!

Exploring Japan Like a Local: A Complete Guide to Japan’s Public Transit

Train Tracks under cherry blossom trees, Kyoto, Japan

Written 30 Nov 2023
Updated 14 Jan 2025
Note from Michelle: This article was first written November of 2023, all prices and price conversions were made at this time and are subject to change. Keep an eye on current currency equivalents if you are planning a trip or using Japan’s public transit system. The ELK app is a great tool to check these.

Japan’s public transit systems are some of the best in the world and by far the best I have ever experienced. It is so sensibly laid out that if – like me – you have very little public transit experience, you can still have it completely figured out in a day or two. In this post, I will be laying out the main ways to pay for trains, buses, or subways, as well as how to navigate each type of station. While it might sound daunting, by the time you finish reading, you will be a Japan Public Transit Pro™️.

This article was made with those who get a bit anxious about making a mistake while using transit in Japan, so I get thorough. If ever you have any questions, feel free to leave a comment or shoot me a DM on my Instagram and I will be happy to offer what assistance I can. A little tip before I begin: have a plan for if you get on the wrong train. This is difficult to do on trains that go long distances between stops, and more common on trains or subways that stop every two minutes. My rule of thumb was to watch my GPS if I got on the wrong train. Once I confirmed if we were on the wrong track, I would get off at the next station and switch lines (which are usually on the other side of the platform, which takes all of 5 steps to get to.) It is no big deal at all. Before I dive more into navigation, first I want to cover how to pay for public transport in Japan.

Most popular for international tourists, the JR passes are a convenient way to travel. You can purchase these passes for different lengths of time and use them as much as you want at any JR train, subway, and even a select few JR buses. We purchased a JR Pass for 2 weeks the first time we visited Japan (2019) and it was awesome for exploring large metropolitan areas like Tokyo, as well as going long distances between major cities. There are a few perks and drawbacks to the JR pass: 

Japan’s Public Transit Breakdown

JR Passes

Perks:

Busy street in Japan

·     Super convenient! To get onto a Shinkansen, you just have to flash your pass to an attendant and they will reserve a seat for you (as all Shinkansen + the Nozomi are reserved seating.) On this second trip to Japan, we did not opt for the JR Pass and had to stand in a long line to reserve both our tickets and our seats. You have to pay both your fare and for the express train reservation, whereas for any normal train, you would just pay for the fare. JR Passes cover both of these.

·     To get on any other JR Train that doesn’t require reserved seating, you simply show your pass at the gate window and go to your train. It is SUPER simple.

·     You don’t have to refill money onto your pass like you would an IC Card, which does remove the trip to ATMs (and any applicable fees incurred.)

*Side note, we use the Charles Schwab card as it has no international fees or ATM fees, which saves a tidy sum if you are going to ATMs abroad often.*

Drawbacks:

·     As of October 2023, the price has increased to 80,000 yen (the equivalent of $537.75 USD at the time of writing this.) Public transit itself is very inexpensive (Like 170-230 yen for a bus ride and slightly more than that at the subway or for non-JR trains depending on how far you go.) I will show a cost breakdown below, but for us, it wasn’t worth the price.

·     JR passes do not include the Nozomi – one of the fastest bullet trains in Japan. To get from Kyoto to Tokyo on the Nozomi took us 2 hours and 15 minutes, but the other main options vary from 2 hours and 40 minutes to 3 hours and 40 minutes. If time really matters, I would choose the Nozomi to maximize your time enjoying the beautiful country. The pass does cover the Hayabusa Train in northern Japan (Hokkaido area,) which is currently the fastest bullet train in Japan.

·     JR Passes don’t work at non-JR lines. As you get away from major travel hubs like Tokyo, Kyoto, or Osaka, fewer JR line options are available. This means that you will have to pay for the subways, trains, or buses you plan to use. If you were hoping to save money, the JR Pass is no longer the way to do this, at least until their prices drop (if they ever do.) 

Why doesn’t the JR pass cover the Nozomi? According to the JR Site:

“The answer is twofold. One reason is to keep the Nozomi for commuter travel only, and second is to offer the JR Pass at the price it currently is. Including the Nozomi would up the price significantly.”

Onto Option B – IC Cards

Image of a Pasmo Card - one popular IC card used to access public transit

Important update for IC Cards:
Update posted 14 Jan, 2025
Due to an IC chip shortage, all the IC Card companies have suspended selling blank IC Cards. Luckily, they offer a personalized IC Card option where you register your information at any ticket counter or machine. This will get you the personalized IC Card and help the governing body of Japan’s transit systems keep track of sales and, hopefully, prevent misuse of IC Cards.

There is also an option to buy a “Welcome Suica,” the traveler/visitor version of the classic Suica card. These are available at both Tokyo airports, the Travel Service Centers located in Tokyo, Shinagawa, Shibuya, Shinjuku, Ikebukuro, and Ueno stations, and the Japan Rail Cafe in Tokyo Station.

Another option for using Japan’s public transit is getting an IC Card. Everywhere accepts these, from busses, trains, subways, airport express trains, and even some vending machines. They are simply a card with money loaded onto them – like a debit card. You put money onto physical cards by visiting an ATM with IC charging capabilities. Any 7/11 ATM will do it (and they are EVERYWHERE.) As of late physical copies are not as available due to chip shortages. Certain places, like the Haneda and Narita Airports, and many train stations sell some, so keep your eye out. You can purchase them online in advance and have the company mail them to you before your trip. We did this option for our Pasmo Cards and it was very convenient. The other option is to get a digital version, add it to your iPhone’s mobile wallet, and recharge it through Apple Pay. For non-iPhone users, you can download the specific IC card apps, but they are created for Japanese residents, are only in Japanese, and require a feature not found on mobile phones made outside of Japan. I would NOT recommend doing this and purchasing your card in advance.

Top 3 Most Common IC Card Brands are:

  1. Pasmo (we used this one)
  2. Suica
  3. ICOCA

Here are the Perks and Drawbacks:

Perks:

·     Charge, tap, go – it is so easy. When you get to the gate, tap the IC pad with your card or phone, the doors will open, and the display at the end will show your balance. Is that all you have to do? Yep. That is it!

·     These cards are accepted everywhere. The main drawback of the JR pass is if you choose to not take a JR train, you have to pay for your fare (which is almost always done by loading up an IC Card and tapping it at the gate.) I did not encounter a single train, subway, or bus that didn’t take IC cards

Drawbacks:

·     While IC Cards come in a digital version, my mobile wallet had issues downloading mine, but had no problem with my husband’s. Should you want to use Japan’s public transit with an IC card, and can’t get it to download or connect to a payment type, you will need a physical card BEFORE you take any kind of transit.

·     The IC Cards do not cover highway bus fare. These busses are closer in style to Greyhound busses or tour busses.

·     You have to keep track of and reload these cards. This may mean you make frequent stops at the 7/11 ATM to put more money on. This may be irksome to some people, and slightly inconvenient if you are low on funds and have to stop your fun-filled day to recharge. Make it an experience by grabbing a Pocari Sweat and a snack, it will only take about 5 minutes.

·     DO NOT RUN OUT OF MONEY ON YOUR CARD! I cannot emphasize this enough. One person did not have enough for her full fare and the driver held the bus until she got exact change from her bag to pay for the ride. What would happen if you ran out and couldn’t pay? I have no idea, but I didn’t get the chance to test it out. Train & Subway gates will alert you if funds are too low. There are always ATMs in the immediate vicinity if you are in this situation. A good rule of thumb in Japan is to always have cash on you, we had about 10,000 yen ($66 USD) between us, which felt pretty good. A fair amount of places we went to were cash only anyway, so it is a good idea to be prepared.

Now that you know how to pay, let’s talk about how to use Japan’s public transit.

Bridge over river with cherry blossoms in bloom, Hiroshima, Japan

Shinkansen and Nozomi

Bullet trains are perhaps the most famous of Japan’s public transit. They are comfortable, relatively inexpensive, and insanely fast. They are the most complicated trains to book in Japan, which isn’t saying much because all the transit is super simple to use. Essentially you need one extra ticket compared to any other train. These can be purchased in any train station (with a Shinkansen track of course) in the main Shinkansen ticket office. These are clearly marked and easy to find, simply follow the signs to the booths and hop in line. Let the agent know where you are going and they will get everything booked and purchased for you. You can also buy some of these online in advance, and then get your physical tickets at the kiosks. I should let you know that this is an “advanced train user move™️.” If you have connections you NEED to make to other trains and don’t purchase online correctly, you may miss your connections. Imagine if you booked two flights back-to-back manually, but overestimated your speed in the airport and missed your second flight. Same idea with manually booking trains. In addition, not all routes are available to be booked online. If in doubt, have one of the kind and knowledgeable desk agents book it for you.

Nozomi bullet train in a station in Tokyo, Japan

As I mentioned earlier on the page, these types of trains require reserved seating. Much like a plane, you cannot get on without a reservation. This means you MUST plan extra time in your travel to book your tickets. This ~usually~ doesn’t take a long time, but we once waited as long as 45 minutes to get our tickets booked. If you need to be somewhere at a specific time, you should try to arrive early at the station to get this squared away.

Once you get your tickets, follow the marked signs to your Shinkansen’s platform. Once you arrive at your platform the digital signs above each platform will display when each train is coming and on which side of the platform. Double-check this and then stand on the correct side. Each station will have half walls separating you from the trains, and these often have automatic gates that open when the train has stopped moving.

*A side note about specialty cars*

Many trains have “women-only cars.” This is clearly displayed with pink signs on the train car, in the train car, and on the floor markings on the platform. If you are waiting for your train and notice the floor markings are pink, the train car that stops where you are standing is for females only. While some of these cars only use this rule during specific times, it is better to be safe if you aren’t a female and pick a different car.

Green Cars are distinguished the same way that female-only cars are – with colored labels on the entry doors, inside, and on the standing area for that specific car. As you probably can guess, green cars are denoted with large green labels. The Green Car is a fancy train car much like the first-class seats on an airplane. They cost extra and are extra nice. If you didn’t pre-purchase a ticket onto one of these, pick a different car to board from.

High-Speed Train Etiquette Tips:
  • Stand behind the yellow lines when the train is approaching.
  • Book your seats near the bag storage area if you have large luggage items. The bag storage area is specifically for passengers in those seats. Otherwise, you store your luggage on the rails above your head. If your luggage is too large, you will have to hang onto it. You can store your bags in these areas IF no one’s luggage is there, but if someone occupies the seats, the storage area is technically theirs.
  • As with ALL public transit in Japan, talking on your phone or playing any sort of audio is considered rude. Pop in your headphones and silence your phone.
  • On high-speed trains, it is not considered impolite to eat on the train. For other trains or subways, it is. If in doubt, high-speed trains have tray tables to make eating cleaner and easier. You will not find tray tables on the other kinds of trains.
  • Listen to the announcements – usually told first in Japanese, then in English. They are useful to know how close you are, and, in some situations, the conductor will ask everyone to switch the seat’s directions. If this happens, a lever is on the aisle side of the chairs. Push this lever and swing the chairs around.
Shibuya Scramble Crossing in Tokyo, Japan

Local Trains and Subways

Local trains and subways are thoughtfully laid out and directions are available in both Japanese and English everywhere you go. The best part is that this form of Japan’s public transit is color-coordinated. If you take the Hankyu line and it is circled in purple, follow all of the purple arrows and you will find the correct platform. Once you tap your IC card at the gate, you can follow these signs. Then you must determine which direction you are going. If you look at the walls behind the trains or on the maps between the platforms, you will see signs with arrows pointing in the directions the trains are going. Then you should see labeled where you are, the stop the train is coming from will be listed on one side, and the stop where the train is going will be listed on the other with an arrow indicating the direction the train is going. Take a few moments to study the maps or information noted on the boards to help you better understand the area or any alerts there may be.

This method is quite useful if you have no other way of routing yourself and are told which line you need to take to get to your desired stop. The good news is both Apple and Google Maps are excellent and hyper-specific at getting you to the right station, platform, and even the best train car to get onto. I recommend using a GPS like this to route you, and then the aforementioned information to double-check your navigation.

After riding to your stop, tap the IC card spot to be let out of the main gate area. Note which exit number you take when leaving your subway or train station. Sometimes your GPS will recommend taking a specific exit to be closer to your intended destination. It is also wise to remember where you came from to be able to orient yourself should you need to return the same way.

Monkey on a scooter
Don’t monkey around – follow these etiquette tips for a better public transit experience!
Local Train tips:
  • Sneezing or coughing loudly will earn you some side-eye from the locals on the train. If you are genuinely sick, it is a cultural standard to wear a mask. If you are not sick, try to sneeze/cough into a tissue or elbow as quietly as you can.
  • Blowing your nose loudly will also earn you the side-eye.
  • Priority seating is for those who need it. If there is no one on the train that needs the seats or the train is mostly empty, you can occupy those seats. If the train is busy or you see a person who may need a seat, be sure to offer your seat.
  • As with high-speed trains, loud noises like talking on your phone or playing audio are considered very impolite and inappropriate. Keep headphones in, talk at a low volume, and silence your phone. 

Busses

Busses work the same way they work in the US, with buttons to press should you need to get off and priority seats for people in need. To use the bus, enter through the middle door, never the front. If you see an IC card tap pad, this bus charges you by distance, not a flat rate. Tap your card when you get in. Then, when your stop comes, exit through the front of the bus by the driver, tapping your card on your way out. If the bus does not have an IC card pad by the middle doors, it is a flat rate fare. Pay these when you leave! There are certain bus lines where you can purchase day passes and you pay a flat rate for the whole day. This can be an awesome deal if you want to see a lot of sights in one day. We saw these in Kyoto and they covered a huge amount of the city, but if you leave the major metropolitan area, you have to pay a supplemental amount to cover the extra distance. 

Man walking along the Philosopher's Path during Cherry Blossom Season

My actual cost of using Japan’s public transit for 2 weeks (for a single person)

Cities Visited – Sapporo, Kinosaki Onsen, Kyoto, Osaka, and Tokyo

Flight from Tokyo to Sapporo – 9,090 yen = $60.79 (via Jetstar)

Flight from Sapporo to Osaka – 14,890 yen = $99.58 (via Jetstar)

Express Train from Osaka to Kinosaki Onsen – 7,660 yen = $51.21

Kinosaki to Kyoto – 5570 yen = $37.24

Kyoto to Tokyo via the Nozomi price on 11/7/23 14,170 yen = $94.74 (most expensive total train ride.)

Total IC Card used for subways, short train trips, and busses 13,000 yen = $86.92

Total spent on public transit = $270.11 (difference between the total cost of a JR pass and what we spent = $267.64) Flights are not calculated as they aren’t a form of public transit that could be covered by JR passes. Even if they were, the savings difference still favors not purchasing a JR pass.

River at sunrise in Arashiyama, Kyoto, Japan

Final thoughts:

As of right now, I do not think it is a better deal to get a JR pass. I liked having it in the past when it was less than or equal to $300 per person, but at its current price, I don’t think I would purchase it.

Japan’s public transit is incredible . It is easy to learn and use and the most cost-effective way to explore the beautiful sights, cities, and countryside of Japan.

Did you know I wrote an eBook about exploring and photographing Japan? Check it out here!

 Useful links:

https://www.japan-guide.com/e/e2359_003.html#digital

https://www.jrpass.com/blog/what-is-the-nozomi-train#:~:text=Apart%20from%20that%2C%20the%20train,the%20price%20it%20currently%20is.